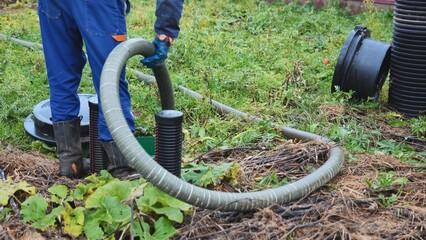
A septic system may be buried underground, but it plays an essential role in keeping a property clean and functional. When a property is not connected to a municipal sewer system, a properly designed septic system provides an effective way to collect, treat, and manage household wastewater. However, installing a septic tank is much more involved than simply digging a hole and placing a tank underground.
The process requires careful planning, proper site evaluation, suitable equipment, and attention to local requirements. Understanding how septic tank installation works helps homeowners know what to expect and why each stage matters. Visit Website for more information.
What Is a Septic Tank System?
A septic system is an underground wastewater treatment system designed to collect and treat wastewater produced by a property. The system typically includes a septic tank, inlet and outlet pipes, and a drain field. Wastewater from toilets, sinks, showers, washing machines, and other plumbing fixtures flows through the home’s main sewer line and enters the septic tank.
Inside the tank, wastewater separates into different layers. Heavy solids settle at the bottom and form sludge, while lighter materials such as grease and oils rise to the surface and create a scum layer. The liquid wastewater remains between these layers and eventually flows out of the tank toward the drain field. The soil in the drain field provides additional treatment as the wastewater moves through the ground.
A properly installed septic system depends on every component working together. If the tank is incorrectly sized, improperly positioned, or connected to a poorly designed drain field, the system may experience problems later. This is why installation requires more planning than many homeowners initially expect.
The First Step Is a Professional Site Evaluation
Before installation begins, the property must be evaluated to determine whether a septic system can be installed successfully. The site evaluation considers factors such as soil characteristics, property size, drainage conditions, groundwater levels, and the available space for the tank and drain field.
Soil is particularly important because the drain field depends on the surrounding ground to absorb and treat wastewater. Soil that drains too quickly may not provide adequate treatment, while soil that drains too slowly may cause wastewater to accumulate near the surface. A professional evaluation helps determine whether the proposed system is appropriate for the property’s conditions.
The location of wells, structures, property boundaries, driveways, and other features may also need to be considered. The tank and drain field must be positioned carefully to provide sufficient access and reduce potential risks. Proper planning at this stage can prevent installation complications and future maintenance difficulties.
Choosing the Right Septic Tank Size
The size of the septic tank is another important part of the installation process. A tank needs enough capacity to handle the wastewater generated by the property while allowing solids to settle properly. Choosing a tank that is too small can lead to more frequent pumping and may increase the risk of system problems.
Tank sizing is generally based on expected wastewater production and the needs of the property. Household size, the number of bedrooms, water usage, and other factors can influence the appropriate tank capacity. A professional can evaluate these factors and recommend a suitable system design.
The type of tank material can also vary. Septic tanks may be manufactured from materials such as concrete, fiberglass, or plastic. Each material has different characteristics involving durability, weight, installation requirements, and resistance to certain conditions. The choice should be based on the property’s needs and professional recommendations.
Preparing the Installation Area
Once the system design and tank location have been determined, the installation area must be prepared. This typically involves marking the locations of the tank, connecting pipes, and drain field. Equipment may then be used to excavate the areas required for installation.
Excavation needs to be performed carefully because underground utilities and existing structures may be nearby. The depth and dimensions of the excavation depend on the tank design and site conditions. The area must be prepared so that the tank can be positioned securely and remain stable after installation.
The drain field area also needs careful preparation. Soil conditions and grading must be considered to ensure wastewater can move through the system as intended. Poor preparation can affect drainage and contribute to future problems, making this stage an important part of the overall installation.
Installing the Septic Tank
After excavation is completed, the septic tank is carefully placed into the prepared area. The tank needs to sit securely and remain level to support proper wastewater flow. Depending on the tank material and site conditions, specialized equipment may be required to move the tank safely into position.
The inlet and outlet connections are then installed. The inlet pipe connects the home to the septic tank and carries wastewater into the tank. The outlet allows treated liquid wastewater to leave the tank and travel toward the drain field.
The connections must be properly aligned and sealed to prevent leaks or unnecessary movement. Improper pipe installation can interfere with wastewater flow and create problems later. Professionals inspect the connections and tank placement before the system is covered.
Installing the Drain Field
The drain field is a critical component of the septic system because it receives wastewater from the tank and allows it to filter through the surrounding soil. The design of the drain field depends heavily on the property’s soil and drainage characteristics.
Pipes or distribution components are installed within the prepared drain field area. These components distribute liquid wastewater throughout the designated area. The wastewater then moves through the soil, where natural processes provide additional treatment before the water reaches groundwater.
The drain field needs to remain protected after installation. Heavy vehicles, structures, and excessive soil compaction can interfere with its ability to function properly. Homeowners should understand where the drain field is located and avoid activities that could damage underground components.
Connecting the Septic System to the Home
After the tank and drain field are installed, the system must be connected to the property’s existing plumbing. The main wastewater pipe from the building is connected to the inlet side of the septic tank. This allows wastewater from household fixtures to flow into the tank.
Proper slope is important for gravity-fed systems because wastewater needs to move efficiently from the home into the tank. Pipes should be installed at appropriate depths and angles based on the system design. If the slope is incorrect, wastewater may move too slowly or fail to flow properly.
The connections should be inspected for leaks and alignment before the system is covered. Any problems discovered at this stage are generally easier to correct than problems discovered after the excavation has been filled. Thorough inspection can therefore help protect the system’s long-term performance.
Testing and Inspecting the System
Before the installation is considered complete, the septic system should be inspected and tested according to the applicable requirements. Professionals may check the tank’s position, pipe connections, access openings, and other components.
The system may also be tested to confirm that wastewater can move from the home into the tank and from the tank toward the drain field. Any potential issues should be addressed before the installation area is completely restored.
Inspection is important because many septic components will be underground and difficult to access once the property has been restored. Identifying installation problems before final backfilling can save time and reduce the likelihood of future repairs.
Backfilling and Restoring the Property
Once the septic system has been inspected and approved, the excavated areas can be backfilled. Soil is placed around the tank and other components to provide support and restore the surface of the property. Backfilling must be performed carefully to avoid damaging the tank, pipes, or other underground components.
The final grading of the property is also important. Water should be directed away from the septic system where appropriate rather than being allowed to accumulate around the tank or drain field. Excessive surface water can interfere with the system’s ability to process wastewater.
After the installation area has been restored, homeowners should avoid placing heavy structures or vehicles over areas containing septic components unless the system was specifically designed to support such loads. Maintaining clear access to the tank is also important because the tank will eventually need inspection and pumping.
Maintaining a Newly Installed Septic System
Installing a septic system is only the beginning of responsible septic ownership. Regular maintenance is necessary to keep the system working properly. One of the most important tasks is having the septic tank inspected and pumped when necessary. The exact pumping frequency depends on factors such as household size, tank capacity, water usage, and the amount of solids accumulating inside the tank.
Homeowners should also be careful about what enters the septic system. Non-biodegradable materials, excessive grease, oils, harsh chemicals, and inappropriate waste can interfere with the system. Toilets should generally only be used for human waste and toilet paper.
Water conservation is another important maintenance practice. Excessive water entering the system can place unnecessary strain on the tank and drain field. Repairing leaks, using water efficiently, and spreading laundry loads throughout the week can help manage wastewater volume.
Common Mistakes to Avoid During Installation
Poor planning is one of the biggest risks during septic tank installation. Installing a system without properly evaluating the soil, groundwater, drainage, and available space can create serious problems later. The system should be designed around the property rather than simply choosing a convenient installation location.
Improper tank placement and pipe connections can also affect system performance. A tank that is not level or pipes that are installed incorrectly can interfere with wastewater flow. The drain field can also fail prematurely if it is poorly designed or installed in unsuitable soil.
Another common mistake is failing to consider future maintenance. Septic tanks need access for inspection and pumping, so access points should remain reasonably accessible. Homeowners should also keep accurate records of the system’s location, installation details, inspections, and maintenance.
Conclusion: Proper Installation Creates a Strong Septic System
Septic tank installation is a detailed process that begins with site evaluation and system planning and continues through excavation, tank placement, pipe connections, drain field installation, testing, and property restoration. Each stage plays an important role in ensuring that wastewater can move through the system properly and that the surrounding soil can perform its treatment function.
A successful installation depends on appropriate system design, suitable soil conditions, accurate tank placement, properly installed pipes, and a well-designed drain field. Professional evaluation and installation can help reduce the risk of problems caused by poor planning or incorrect installation.
Once the system is installed, homeowners must continue caring for it through regular inspections, timely pumping, responsible waste disposal, water conservation, and drain field protection. A septic system can provide reliable wastewater treatment for many years when it is properly designed, installed, and maintained. Understanding how septic tank installation works gives homeowners a better appreciation of the system and the importance of protecting it from the beginning.